Saturday, May 18, 2013

Tuesday, February 19, 2013
Mini Maker Faire Las Vegas
Some quick pics from the


 Wanted to take R2 home.....


A very good 1st year turnout and enjoyable day.


A very good 1st year turnout and enjoyable day.
Saturday, January 12, 2013
CES 2013 3D Printer Companies
Makerbot and 3D Systems booths
A showdown is starting to form The MakerBot vs Cubify brands !
Makerbot had a booth that was located with a large Marvel brand wall behind them. This caused a lot of bumping into people trying to get past the booth.


Cubify Brand They are showing they wish to be a big player in this market, and will spend the money to get there.
Cubify had two booths for 2013. One very expensive booth located around the corner from the very large Sony booth, and the 2nd booth located in the other Convention space.
From the first booth.


The 2nd booth was extremely well planned, and even spacious, Some space was available for a person to sit down and watch the printers. Further it was located right near the entrance to that section of the floor. You couldn’t miss the Cubify booth walking in, manned by bfb/Cubify people .


A showdown is starting to form The MakerBot vs Cubify brands !
Makerbot had a booth that was located with a large Marvel brand wall behind them. This caused a lot of bumping into people trying to get past the booth.


Cubify Brand They are showing they wish to be a big player in this market, and will spend the money to get there.
Cubify had two booths for 2013. One very expensive booth located around the corner from the very large Sony booth, and the 2nd booth located in the other Convention space.
From the first booth.


The 2nd booth was extremely well planned, and even spacious, Some space was available for a person to sit down and watch the printers. Further it was located right near the entrance to that section of the floor. You couldn’t miss the Cubify booth walking in, manned by bfb/Cubify people .


Friday, January 11, 2013
CES 2013 3D Printer Companies
What would a show in Vegas be without a Vegas Girl?
 Walking around the showroom floors.....found these 3D Printing related companies.
Sculpteo A new Printer service bureau


Formlabs had a booth, but by the time and hours of searching for it (confusing maps & info) I was done with the show. Almost 2 million square feet of concrete takes its toll.
Stratasys


The UP printer booth


Sculpteo A new Printer service bureau


Formlabs had a booth, but by the time and hours of searching for it (confusing maps & info) I was done with the show. Almost 2 million square feet of concrete takes its toll.
Stratasys


The UP printer booth


CES 2013 People from RepRap Past
CES 2013
People from RepRap Past
 Bre Pettis Makerbot

 Ian Adkins Bits From Bytes now Cube/Cubify

 John Smith Bfb now Cube


Saturday, January 15, 2011
New field of research 1.5
I have some joy today as I’ve returned to a line of research. This will be a quick memo blog. The first part ended with this blog. http://probersideas.blogspot.com/2010/06/new-field-of-research.html
The Changes
I made some major changes in my systems just to return to this matter. First to go, was the Gen3 electronics. In hindsight I couldn’t recommend them to anyone. IMHO, they suffer from EMI issues, among in general being a poor design.
Next to go was the PTFE insulator. I’ve replaced the hot end with a peek only compact hot end from MakerGear.
more to come in 2.0
The Changes
I made some major changes in my systems just to return to this matter. First to go, was the Gen3 electronics. In hindsight I couldn’t recommend them to anyone. IMHO, they suffer from EMI issues, among in general being a poor design.
Next to go was the PTFE insulator. I’ve replaced the hot end with a peek only compact hot end from MakerGear.
more to come in 2.0
Monday, January 3, 2011
The Jury isn’t out
In 2010 the community received a wake up call in the Up printer. It wasn’t rocket science that was the wake up call. The basic ideas and concepts of the UP printer were all out there. It took the Up designers to fine tune the ideas into a project.
Parts of the community have learned from the UP printer. Quality and speed don’t have to be sacrificed for production.
2011 brings with it the hopes of continuous improvements in quality, and speed for our Repraps.
While some have come to dismiss the Prusa Mendel, they miss many of the features that make this simple design worthy of replacing the “Classic” Mendel. Let’s face the facts; the “Classic” Mendel is now an old design of 2008-09. The Prusa Mendel moves us forward late 2010 forward.
While many continue to argue the merits of the “Classic” Mendel vs the Prusa Mendel, they just need to catch up to the moving front, as the Jury has come back in. The replacement for the “Classic” Mendel is the Prusa Mendel.
Parts of the community have learned from the UP printer. Quality and speed don’t have to be sacrificed for production.
2011 brings with it the hopes of continuous improvements in quality, and speed for our Repraps.
While some have come to dismiss the Prusa Mendel, they miss many of the features that make this simple design worthy of replacing the “Classic” Mendel. Let’s face the facts; the “Classic” Mendel is now an old design of 2008-09. The Prusa Mendel moves us forward late 2010 forward.
While many continue to argue the merits of the “Classic” Mendel vs the Prusa Mendel, they just need to catch up to the moving front, as the Jury has come back in. The replacement for the “Classic” Mendel is the Prusa Mendel.
Sunday, December 19, 2010
Quick Temperature Hack
One frustration with Reprap for me has been the fragile nature of the beast. Seems like I get one item fixed another item breaks on me. Such was the case with my thermistor.
I had rebuilt my hot end, and had my thermistor taped to the nozzle and it generally worked. Thought I had gotten up and running again, then the thermistor failed on me. It was my last one and I had a supply on order.
The problem I realized was getting readings off the nozzle itself.
The wires would get twisted among other issues I had with it. A better way had to be found with the materials at hand.
I attempted to take two washers and make a temp reading washer. It just didn't work right.
Failure
I had rebuilt my hot end, and had my thermistor taped to the nozzle and it generally worked. Thought I had gotten up and running again, then the thermistor failed on me. It was my last one and I had a supply on order.
The problem I realized was getting readings off the nozzle itself.
The wires would get twisted among other issues I had with it. A better way had to be found with the materials at hand.
I attempted to take two washers and make a temp reading washer. It just didn't work right.
Failure

Then it hit me, the trusty Paperclip. The more I played with the idea the more ideal this became for a quick temperature hack or more.
The Trusty PaperClip

It can be reused, it’s modular
Can be turned to adjust the wires
The nozzle can be changed with no issues
Working Parts
All you need to do is pick the right size paperclip for your hot end.
Bonus!!! Need to see if your temp is working? Turn on your software and put your two fingers on the end of the paperclip and you will shortly find out if it’s working or not.
How it works

The small end of the Paperclip acts like a nut and can be screwed down to any level needed. Just make sure you use plenty of tape.
Wires Wrapped

Make sure the wires are fully wrapped as you don’t need any contact or shorts.
Finish Wrap

Finish wrapping the glass bead so you have one complete, taped up device.
Placement

Lock in the glass bead leaving the small space at the Paperclip top, to be used as a locking means.
Finished.

Finish off the device by taping down the locked in glass bead. You’re all done.
TEST
You are ready to test.

Monday, November 8, 2010
Whistles for Josef A RepRap Action.

Repost of the Blog by Rick Pollack
"Josef Prusa - the Prusa in the Prusa Mendel - is giving a presentation at the TedX event in Prague on November 20th. He is printing 300 whistles to hand out to the attendees but he is up against the clock.
If you have the technology to print some whistles and you can have them in Prague by the 20th...let me know and I'll get you the shipping address..."
Update: Link to more info: How to send a whistle
Thursday, November 4, 2010
3D Printed Cars & MDAR bots for Area 51
Couple of news stories that might be of interest ….
3D Printed Cars May Be the Way of the Future and MDAR the new bots for Area 51 etc.
"Urbee, a two passenger car, is being designed by Kor Ecologic Inc., using Stratasys 3D printers. Kor Ecologic probably chose Stratasys because their printers are considered cheap and reliable; I know that they're reliable because I have seen them myself and I know what they can make. But cheap? If you consider a $14,900 cheap for a small printer, then sure, why not, but I can't imagine how much a large 3D printer capable of printing car parts could cost!"
==================================
Robots Invade Nevada National Security Site
"And it's in this spirit of optimism -- some might say naivete -- that technical whizbangs working for the Nevada National Security Site, formerly known as the Nevada Test Site, have unveiled the MDARS, short for Mobile Detection Assessment Response System. Call them what you want, they're robots. And they are now on the job patrolling sensitive parts of the sprawling desert facility.
"It thinks on its own, and in that regard it doesn't require the constant plume of intervention," said NNSA senior engineer Steve Scott."
3D Printed Cars May Be the Way of the Future and MDAR the new bots for Area 51 etc.
"Urbee, a two passenger car, is being designed by Kor Ecologic Inc., using Stratasys 3D printers. Kor Ecologic probably chose Stratasys because their printers are considered cheap and reliable; I know that they're reliable because I have seen them myself and I know what they can make. But cheap? If you consider a $14,900 cheap for a small printer, then sure, why not, but I can't imagine how much a large 3D printer capable of printing car parts could cost!"
==================================
Robots Invade Nevada National Security Site
"And it's in this spirit of optimism -- some might say naivete -- that technical whizbangs working for the Nevada National Security Site, formerly known as the Nevada Test Site, have unveiled the MDARS, short for Mobile Detection Assessment Response System. Call them what you want, they're robots. And they are now on the job patrolling sensitive parts of the sprawling desert facility.
"It thinks on its own, and in that regard it doesn't require the constant plume of intervention," said NNSA senior engineer Steve Scott."
Thursday, October 7, 2010
First Impressions Gen6 Electronics
This morning I was handed a set of the new Gen6 Electronics manufactured in the Netherlands by Mendel parts.com
I haven’t written much lately, and frankly this new “gift” to the RepRap community forced me to make the time available.
Most of the time I don’t like to buy electronic items on the first run. I like to buy when items come down in price, and have any bugs taken care of. When I reviewed the hype (in hindsight), of Generation 3 electronics I thought that I was buying a mature, bug free design. I’m going to be kind to MBI here and just say “not as advertised”.
At first look, Gen6 electronics truly can be advertised as “plug and play”. I will know much better when I hook everything up and start running.
Pics from the web site just don’t do this set justice. We are talking a quality board here. Just new I had to take some quick pics, and show the community what they haven’t seen yet.
I love when a product has some thought given to it. Truly, the optics are a Gem! Who ever thought of the endstop optics design, needs to be given real thumbs up! No fiddling around with solder, just plug and play, the real thing.

From these pics you can see its very comfortable size compared to a standard Gen3 extruder board..

Front and Back sides.


To sum up my first impressions; Gen6 is everything Gen3 should have been!
I haven’t written much lately, and frankly this new “gift” to the RepRap community forced me to make the time available.
Most of the time I don’t like to buy electronic items on the first run. I like to buy when items come down in price, and have any bugs taken care of. When I reviewed the hype (in hindsight), of Generation 3 electronics I thought that I was buying a mature, bug free design. I’m going to be kind to MBI here and just say “not as advertised”.
At first look, Gen6 electronics truly can be advertised as “plug and play”. I will know much better when I hook everything up and start running.
Pics from the web site just don’t do this set justice. We are talking a quality board here. Just new I had to take some quick pics, and show the community what they haven’t seen yet.
I love when a product has some thought given to it. Truly, the optics are a Gem! Who ever thought of the endstop optics design, needs to be given real thumbs up! No fiddling around with solder, just plug and play, the real thing.

From these pics you can see its very comfortable size compared to a standard Gen3 extruder board..

Front and Back sides.


To sum up my first impressions; Gen6 is everything Gen3 should have been!
Tuesday, August 3, 2010
A wake up call !
I was shocked this morning when I opened my email.
Let me digress for a moment to tell the story.
I’ve been on my quest to get a decent RepRap going. Seems each time I turn around Its another patch up job or a visit to the local hardware store (they know me now). With no Reprap parts available you have to “innovate” and make your own hacked up fixes.
Sometimes you get to the point of no return. You must ask for others for help as only a new printed RP part will do the job> Only way to make all the other hacks work. This was my case; I had a hacked up revised extruder that worked. Only problem, the Darwin x carriage would not do the job. It only had a very small dc motor on it, just couldn't handle the small weight. You see the part was an early Cast Reprap made out of Polyurethane. I’ve learned so much since I bought it.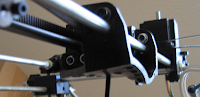
Anyhow, I tried Emailing for some help to print out some parts. The end result would bring some much need strength into the project. Some people said they would help and never would reply to again to the emails. Some offered to build for a cost, no problem if it wasn’t an arm and a leg, I would have gone for it. In the end nothing came of it. With all the users in the community out there my only hope turned to posting in the forums. http://forums.reprap.org/read.php?95,51778 Posted on 7/15/2010,
Up until the time of this blog posting, not one email, or contact has come from that post. That was until today’s surprise email.
See a new firm with the UP Printer http://www.pp3dp.com/ just released a new 3DPriter to the Reprap community. They had an offer that I thought might be great to try.
http://pp3dp.com/index.phpoption=com_content&view=category&layout=blog&id=42&Itemid=56
Step 3. If you kindly provide your input to all the questions in the survey, we are willing to mail your 3D model to you only for the cost of mailing for our appreciation of your feedback.
So I looked up the old STL, done in AOI I believe, and sent off an email to them This was in late afternoon for me. Like many of the firms now days, I expected some game, or to be ignored as in my past experiences. To my shock in this mornings email
I received these beautiful jpegs. This UP printer firm means business, and is building good will!
Side note: I may have gotten lucky. Reviewing the jpeg’s shows that the reinforcements in the UP software have made one of the best,if not the Best Darwin x-carriages ever repraped.


Let me digress for a moment to tell the story.
I’ve been on my quest to get a decent RepRap going. Seems each time I turn around Its another patch up job or a visit to the local hardware store (they know me now). With no Reprap parts available you have to “innovate” and make your own hacked up fixes.
Sometimes you get to the point of no return. You must ask for others for help as only a new printed RP part will do the job> Only way to make all the other hacks work. This was my case; I had a hacked up revised extruder that worked. Only problem, the Darwin x carriage would not do the job. It only had a very small dc motor on it, just couldn't handle the small weight. You see the part was an early Cast Reprap made out of Polyurethane. I’ve learned so much since I bought it.

Anyhow, I tried Emailing for some help to print out some parts. The end result would bring some much need strength into the project. Some people said they would help and never would reply to again to the emails. Some offered to build for a cost, no problem if it wasn’t an arm and a leg, I would have gone for it. In the end nothing came of it. With all the users in the community out there my only hope turned to posting in the forums. http://forums.reprap.org/read.php?95,51778 Posted on 7/15/2010,
Up until the time of this blog posting, not one email, or contact has come from that post. That was until today’s surprise email.
See a new firm with the UP Printer http://www.pp3dp.com/ just released a new 3DPriter to the Reprap community. They had an offer that I thought might be great to try.
http://pp3dp.com/index.phpoption=com_content&view=category&layout=blog&id=42&Itemid=56
Step 3. If you kindly provide your input to all the questions in the survey, we are willing to mail your 3D model to you only for the cost of mailing for our appreciation of your feedback.
So I looked up the old STL, done in AOI I believe, and sent off an email to them This was in late afternoon for me. Like many of the firms now days, I expected some game, or to be ignored as in my past experiences. To my shock in this mornings email

I received these beautiful jpegs. This UP printer firm means business, and is building good will!
Side note: I may have gotten lucky. Reviewing the jpeg’s shows that the reinforcements in the UP software have made one of the best,if not the Best Darwin x-carriages ever repraped.


Saturday, June 26, 2010
New field of research
Today I started a new field of research dealing with the “cooling zone” inside the insulator and below.
What I made up was a heat shield. My theory is that we have been concerned with the heat within metals; I wanted to deal with the unseen radiant energy.
My first tests tell me I’m on to something. I seem to have blocked some of the heat from the insulator and created a new mess of Radio interference.
The once working temp system failed in reading and providing power for heat, frankly it went nutz. So its time to do a complete rethink of the shielding of the wires and retest.
What I made up was a heat shield. My theory is that we have been concerned with the heat within metals; I wanted to deal with the unseen radiant energy.
My first tests tell me I’m on to something. I seem to have blocked some of the heat from the insulator and created a new mess of Radio interference.
The once working temp system failed in reading and providing power for heat, frankly it went nutz. So its time to do a complete rethink of the shielding of the wires and retest.
Wednesday, June 16, 2010
Poor man’s enclosure
aka heated chamber, heated room
http://hydraraptor.blogspot.com/2010/06/wooden-overcoat.html
Another problem with ABS is the fumes. My Mendel extruder seems to give off more fumes than HydraRaptor's does, perhaps because the melt zone is much bigger, and the white ABS seems to smell more acrid than natural ABS. I did a build with a window open to get rid of the fumes but most of the parts then warped, presumably because there was no longer a buffer of warm air around them, but a cool breeze.
In an attempt to tackle both of these problems I built an MDF box around my Mendel.
In my case everything I’m working on is “experimental” and in the process of rebuilding. What was needed was a method to grow with my projects. The answer was simple. Build an enclosure out of clear plastic aka "Visqueen" film. Thick enough to do the job and hold up to use.
Lightweight, flexible polyethylene construction film offers economical all-weather protection indoors or out. Known as "Visqueen" film - a brand name, although this is a commodity plastic product.
Some quick thoughts/ideas:
1) Make a front folding flap and install a couple of magnets to lock the cover when U need it closed.
2) Your stepper motors produce heat, cool them and reuse the heat. Install a fan blade on the unused shaft side,FREE cooling/reuse heat. Many sub-ideas can come off this simple idea.
A) Like the back and forth of the stepper could be used to make a one way fan.
B) The free air movement can be used to vent out the fumes.
Give me some links with your projects off these ideas. Would enjoy seeing them!
http://hydraraptor.blogspot.com/2010/06/wooden-overcoat.html
Another problem with ABS is the fumes. My Mendel extruder seems to give off more fumes than HydraRaptor's does, perhaps because the melt zone is much bigger, and the white ABS seems to smell more acrid than natural ABS. I did a build with a window open to get rid of the fumes but most of the parts then warped, presumably because there was no longer a buffer of warm air around them, but a cool breeze.
In an attempt to tackle both of these problems I built an MDF box around my Mendel.
In my case everything I’m working on is “experimental” and in the process of rebuilding. What was needed was a method to grow with my projects. The answer was simple. Build an enclosure out of clear plastic aka "Visqueen" film. Thick enough to do the job and hold up to use.
Lightweight, flexible polyethylene construction film offers economical all-weather protection indoors or out. Known as "Visqueen" film - a brand name, although this is a commodity plastic product.
Some quick thoughts/ideas:
1) Make a front folding flap and install a couple of magnets to lock the cover when U need it closed.
2) Your stepper motors produce heat, cool them and reuse the heat. Install a fan blade on the unused shaft side,FREE cooling/reuse heat. Many sub-ideas can come off this simple idea.
A) Like the back and forth of the stepper could be used to make a one way fan.
B) The free air movement can be used to vent out the fumes.
Give me some links with your projects off these ideas. Would enjoy seeing them!
Wednesday, June 2, 2010
Toothed, Bead ,Chain Belting …oh MY !

Since our quest is to lower the cost and improve operation of our RepRaps I felt the need for an alternative belt to what’s currently being used.
Long ago on one of my parts quests I picked up some “Diamond Braided Rope” as a possible drive belt or maybe used in an emergency to fix a RepRap. My belief now is that it’s a very good replacement candidate. The numbers speak for them self. I recently ordered Tooth Belting @ $1.81 a foot, plus shipping, taxes etc. The Braided Rope I purchased cost only $1.00 for 10 feet of the stuff.
Further, this might be a superior product for RepRap as seen in the general specs.
¼” x 10'feet
Braided for Strength
100% polyester strands
Resists rot, mildew, oil, and gas
300lbs working capacity
On the minus side that Red & White is ugly and changes to a V type pulley system would need to be made. It’s made in China, so maybe a pure color is sold someplace.
One feature I really like is that the material is very RepRap like. Looking at the pic you can see that the manufacturer hot slices the material for packaging. This is very advantageous for us. Using a hot means we can melt the polyester to any part we might wish. If we wish a continuous belt I would just butt the two ends together and melt them. If looks or an added protection is needed, then put the seal inside some shrink tube and presto you have a dirt cheap continuous belt.

Another feature: This is round material and therefore makes it superior in looping compared to toothed belts.
Where to buy? I purchased these at Harbor Freight Tools Item number 96186. Also sure these are available at other locations.
Monday, May 24, 2010
“Mendula” Status

For those who know this Star Wars movie: Vader announces “Perhaps I can find new ways to motivate you”.
I have received motivation from the strangest places. Nophead’s continual quality building examples have always been the mark to shoot for.
This project started out as a “winter build” project. It’s now near the end of spring and sometimes the project has been like living in the money pit, but there is much progress.
“Mendula” gets a new name today and becomes “RapBoy”
Subscribe to:
Posts (Atom)