Today I started a new field of research dealing with the “cooling zone” inside the insulator and below.
What I made up was a heat shield. My theory is that we have been concerned with the heat within metals; I wanted to deal with the unseen radiant energy.
My first tests tell me I’m on to something. I seem to have blocked some of the heat from the insulator and created a new mess of Radio interference.
The once working temp system failed in reading and providing power for heat, frankly it went nutz. So its time to do a complete rethink of the shielding of the wires and retest.
Saturday, June 26, 2010

Wednesday, June 16, 2010
Poor man’s enclosure
aka heated chamber, heated room
http://hydraraptor.blogspot.com/2010/06/wooden-overcoat.html
Another problem with ABS is the fumes. My Mendel extruder seems to give off more fumes than HydraRaptor's does, perhaps because the melt zone is much bigger, and the white ABS seems to smell more acrid than natural ABS. I did a build with a window open to get rid of the fumes but most of the parts then warped, presumably because there was no longer a buffer of warm air around them, but a cool breeze.
In an attempt to tackle both of these problems I built an MDF box around my Mendel.
In my case everything I’m working on is “experimental” and in the process of rebuilding. What was needed was a method to grow with my projects. The answer was simple. Build an enclosure out of clear plastic aka "Visqueen" film. Thick enough to do the job and hold up to use.
Lightweight, flexible polyethylene construction film offers economical all-weather protection indoors or out. Known as "Visqueen" film - a brand name, although this is a commodity plastic product.
Some quick thoughts/ideas:
1) Make a front folding flap and install a couple of magnets to lock the cover when U need it closed.
2) Your stepper motors produce heat, cool them and reuse the heat. Install a fan blade on the unused shaft side,FREE cooling/reuse heat. Many sub-ideas can come off this simple idea.
A) Like the back and forth of the stepper could be used to make a one way fan.
B) The free air movement can be used to vent out the fumes.
Give me some links with your projects off these ideas. Would enjoy seeing them!
http://hydraraptor.blogspot.com/2010/06/wooden-overcoat.html
Another problem with ABS is the fumes. My Mendel extruder seems to give off more fumes than HydraRaptor's does, perhaps because the melt zone is much bigger, and the white ABS seems to smell more acrid than natural ABS. I did a build with a window open to get rid of the fumes but most of the parts then warped, presumably because there was no longer a buffer of warm air around them, but a cool breeze.
In an attempt to tackle both of these problems I built an MDF box around my Mendel.
In my case everything I’m working on is “experimental” and in the process of rebuilding. What was needed was a method to grow with my projects. The answer was simple. Build an enclosure out of clear plastic aka "Visqueen" film. Thick enough to do the job and hold up to use.
Lightweight, flexible polyethylene construction film offers economical all-weather protection indoors or out. Known as "Visqueen" film - a brand name, although this is a commodity plastic product.
Some quick thoughts/ideas:
1) Make a front folding flap and install a couple of magnets to lock the cover when U need it closed.
2) Your stepper motors produce heat, cool them and reuse the heat. Install a fan blade on the unused shaft side,FREE cooling/reuse heat. Many sub-ideas can come off this simple idea.
A) Like the back and forth of the stepper could be used to make a one way fan.
B) The free air movement can be used to vent out the fumes.
Give me some links with your projects off these ideas. Would enjoy seeing them!
Wednesday, June 2, 2010
Toothed, Bead ,Chain Belting …oh MY !

Since our quest is to lower the cost and improve operation of our RepRaps I felt the need for an alternative belt to what’s currently being used.
Long ago on one of my parts quests I picked up some “Diamond Braided Rope” as a possible drive belt or maybe used in an emergency to fix a RepRap. My belief now is that it’s a very good replacement candidate. The numbers speak for them self. I recently ordered Tooth Belting @ $1.81 a foot, plus shipping, taxes etc. The Braided Rope I purchased cost only $1.00 for 10 feet of the stuff.
Further, this might be a superior product for RepRap as seen in the general specs.
¼” x 10'feet
Braided for Strength
100% polyester strands
Resists rot, mildew, oil, and gas
300lbs working capacity
On the minus side that Red & White is ugly and changes to a V type pulley system would need to be made. It’s made in China, so maybe a pure color is sold someplace.
One feature I really like is that the material is very RepRap like. Looking at the pic you can see that the manufacturer hot slices the material for packaging. This is very advantageous for us. Using a hot means we can melt the polyester to any part we might wish. If we wish a continuous belt I would just butt the two ends together and melt them. If looks or an added protection is needed, then put the seal inside some shrink tube and presto you have a dirt cheap continuous belt.

Another feature: This is round material and therefore makes it superior in looping compared to toothed belts.
Where to buy? I purchased these at Harbor Freight Tools Item number 96186. Also sure these are available at other locations.
Monday, May 24, 2010
“Mendula” Status

For those who know this Star Wars movie: Vader announces “Perhaps I can find new ways to motivate you”.
I have received motivation from the strangest places. Nophead’s continual quality building examples have always been the mark to shoot for.
This project started out as a “winter build” project. It’s now near the end of spring and sometimes the project has been like living in the money pit, but there is much progress.
“Mendula” gets a new name today and becomes “RapBoy”
Thursday, April 22, 2010
Makerbot Giveaway Entry #1
BKIc)9YYE!~~_12.jpg)

"SHAKE POWERED"
EMERGENCY LED FLASHLIGHT
EMERGENCY SHAKE FLASHLIGHT WITH WHITE LED & WRIST STRAP US $7.50*
• NEEDS NO BATTERIES
• JUST SHAKE TO ENERGIZE LIGHT
• BRIGHT WHITE LED LIGHT
• WRIST STRAP
Shaker Flashlight: http://www.thingiverse.com/thing:2989
Test print of Inner Case Housing: http://www.thingiverse.com/thing:2736
Shaker Light Case designed to print on Makerbot: http://www.thingiverse.com/thing:2988
This is a great idea with some less than perfect quality Chinese manufacturing!
If memory serves I Paid closed to 10 US dollars for one of these “Shaker lights” plus tax. Buy them on Ebay cheap but you must pay the postage, it still costs. No batteries great, simple to keep around and use when needed.
Mine had a few “issues” the switch didn’t lock in right and then I dropped the light and the case got all screwed up. Generally I like the light and concept it just needs to be “personalized” with RepRap.
These make great personalized gifts. My hope with this project is to personalize the lights for areas of usage. Seems I have a bad habit of picking up the light and putting it in another place then end up looking for it when I need it. So the fix is make one that says “Auto” on it, one for Bedroom, kitchen etc.
Problems with the original design you can purchase: The magnet is locked in with a poor seal on the end. The seal isn’t glued; it kinda just locks in very poorly. I highly recommend A decent bit of tape to lock the seal. If the seal unlocks then the “inner works” moves out of position and the power switch won’t make the correct contact.
The power switch is a very simple mechanism. It pushes the metal contact down, makes contact and you have power. As this project is only to replace the casing we won’t address the issues at this time.

The mirror type mechanism is basically some reflecting foil around the led light. One flat piece of reflection does the job but could be improved on. From what I gathered of the design the idea was to give a little light near the top of the light as well as out of it. Serves no purpose other than look cool.
My first run on this project: covers attempts to make a “clone” very close to the original design. It might have worked, but I put out a test print and asked some questions found that making a copy on a Makerbot would push the machine to its limits. So last minute as my software skills improved, the decision was made to start from scratch again.
Overview: The updated design has two parts
1) Inner Case Housing: is designed to be the printed area to use the “Shaker drop in package”. Contents of a self contained shaker power system, led light, and power switch.

The critical measurement is making the “Shaker drop in” package” fit inside your replication. To make this easy for future versions I made and posted a “test print”
http://www.thingiverse.com/thing:2736
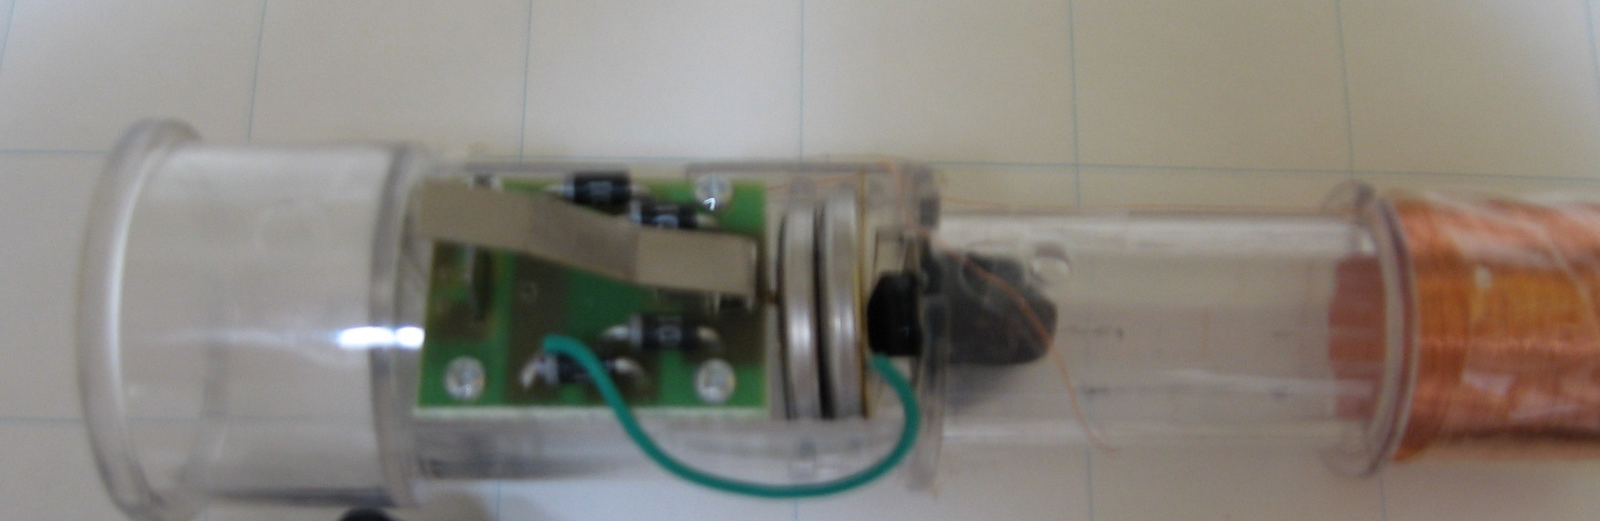
2) Outer Case Package: Contents of the Plastic Lens, Lens Cover, seal and “Outer Case Housing”
In this design we focus on the outer case of the design. We have an “Shaker drop In” package, contents of a self contained shaker power system, led light, and power switch. The inner works fits inside of the outer case and is locked in at the top.
My Hope: This someone buys and stocks ”Shaker drop In” packages. They should be dirt cheap to buy in quantity. Resell them in printer packs of say 6 or 12 units.
This is the perfect demo print for shows. Just print out a bunch of the “Outer Case Housings” maybe personalizes with “made on Makerbot” or some such.
At the demo personalize a name on the Lens cover and make a quick print.
Great as a giveaway and great for giving personalized gifts!
More, Fine details Updated later...
Monday, April 12, 2010
Electrically Conductive PLA
I know the subject of my visit to the APEX expo might be getting a little old. It just was one of those times you had to be there to experience it, and the valuable contacts made.
One such contact was the chemist I met in one booth. Seems the firm he works for worked with various forms of plastic compounds including a super electrically insulating cousin of PLA.
Our conversation was about the RepRap project, making or printing pcb boards etc. So we talked about the possibility of removing the insulating properties of his material, and doping it to become electrically conductive. Can you say “Electrically Conductive PLA” to print out circuits? He took down his notes on the subject, and hopefully will follow up as a “Noob”
The seed has been planted. I know with all my other projects this must be passed on so others might water, and bring the process to maturity. My hope with this post is that enough attention will be gathered and Adrian and Vik will find the emails, keeping them from the spam bucket.
NO SPAM !
One such contact was the chemist I met in one booth. Seems the firm he works for worked with various forms of plastic compounds including a super electrically insulating cousin of PLA.
Our conversation was about the RepRap project, making or printing pcb boards etc. So we talked about the possibility of removing the insulating properties of his material, and doping it to become electrically conductive. Can you say “Electrically Conductive PLA” to print out circuits? He took down his notes on the subject, and hopefully will follow up as a “Noob”
The seed has been planted. I know with all my other projects this must be passed on so others might water, and bring the process to maturity. My hope with this post is that enough attention will be gathered and Adrian and Vik will find the emails, keeping them from the spam bucket.
NO SPAM !
Saturday, April 10, 2010
Essence of an Idea
Last night I was making a second round with the various materials obtained this week at the APEX expo. What nagged on me was the excellent part in production I found at the show. My hope was adapting the part to use in the “V Extruder” project. The part had one major flaw that made it impossible to work. Then the fix for this flaw hit me! It was late in the evening and exhausted, I went to bed. Would deal with it in another day or so.
Saturday: Woke up this morning and to help me wake up I fired up the laptop to get my eyes in focus. Then I put a few words in Google, something from last night. It lead me to a complete, and “brand new” concept, and process.
So my plans for today are screwed. It’s going to be over 80 deg. F, bright and sunshiny. I should be out and about and enjoying the spring weekend. What do I find myself doing after several hours? Documenting the “new processes” for admission to the Patent offices, how sad.
I find myself tortured again! I suffer from the same mindset Thomas Edison suffered from। He used to take short power naps, and would wake up and have fixes or brand new concepts available to him when he awoke. What tortures me, is that in prior times, most of my new ideas were 5-10 years ahead of the technology to manufacture them.
The RepRap projects have been very good to me and my way of thinking। The focus now is on ‘manufacturing”। So to sum up what happened to me this morning….my mind overnight worked out the problem or fix from last night,when I went to bed.
I have about a dozen or so other projects RepRap related in the works. So I Google that word this morning it all came together !!! My mind had combined the ideas from one project, with the fix from last night, and presto a “brand new” concept and process.
By now I’m sure the “Open source” people are all fired up with me saying the word “Patent”. Not to threat, I have it all documented. Parts of this new concept and process will become open in the future. On the restricted side,the licenses pay to bring the major part of the technology to market. Under the documented timeline my hope is to bring something out within a year or less, or maybe I’ll just sleep on this?
Time to enjoy the weekend.
Saturday: Woke up this morning and to help me wake up I fired up the laptop to get my eyes in focus. Then I put a few words in Google, something from last night. It lead me to a complete, and “brand new” concept, and process.
So my plans for today are screwed. It’s going to be over 80 deg. F, bright and sunshiny. I should be out and about and enjoying the spring weekend. What do I find myself doing after several hours? Documenting the “new processes” for admission to the Patent offices, how sad.
I find myself tortured again! I suffer from the same mindset Thomas Edison suffered from। He used to take short power naps, and would wake up and have fixes or brand new concepts available to him when he awoke. What tortures me, is that in prior times, most of my new ideas were 5-10 years ahead of the technology to manufacture them.
The RepRap projects have been very good to me and my way of thinking। The focus now is on ‘manufacturing”। So to sum up what happened to me this morning….my mind overnight worked out the problem or fix from last night,when I went to bed.
I have about a dozen or so other projects RepRap related in the works. So I Google that word this morning it all came together !!! My mind had combined the ideas from one project, with the fix from last night, and presto a “brand new” concept and process.
By now I’m sure the “Open source” people are all fired up with me saying the word “Patent”. Not to threat, I have it all documented. Parts of this new concept and process will become open in the future. On the restricted side,the licenses pay to bring the major part of the technology to market. Under the documented timeline my hope is to bring something out within a year or less, or maybe I’ll just sleep on this?
Time to enjoy the weekend.
Subscribe to:
Posts (Atom)